Contents
Introduction
Textured ceilings, commonly known as popcorn ceilings or stippled ceilings, were once a staple of mid-to-late 20th-century home design. They were practical, offering sound dampening and hiding imperfections. However, in today’s home aesthetics, they’re often seen as outdated and undesirable. Whether you’re remodeling, preparing your home for sale, or simply craving a more modern look, many homeowners are asking the same question — how to remove textured ceiling safely and efficiently?
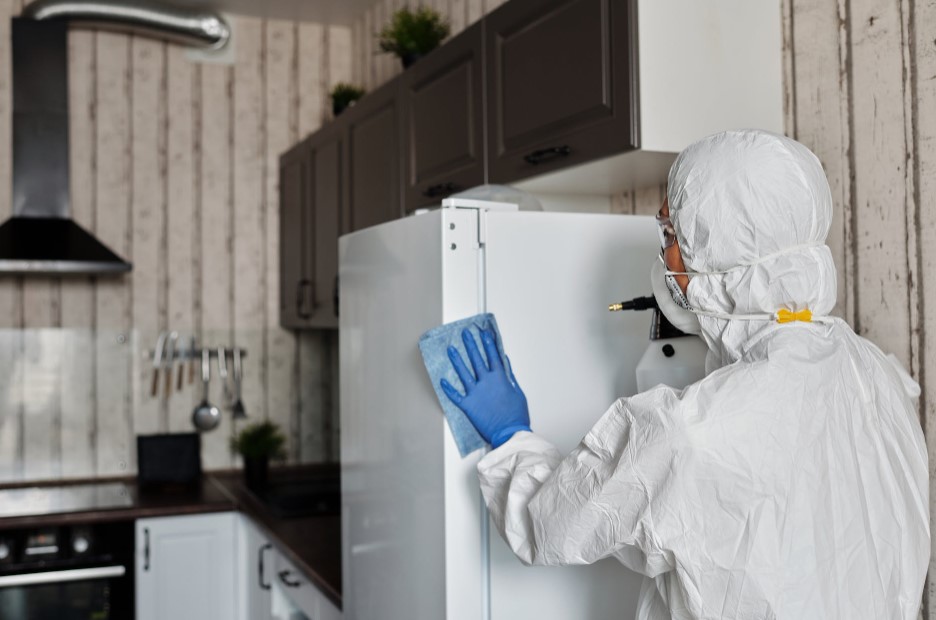
Removing a textured ceiling isn’t always a simple scrape-and-go task. It can be labor-intensive, messy, and in some cases, potentially hazardous, especially if your home was built before the 1980s when asbestos was commonly used in ceiling textures.
In this comprehensive guide, we’ll walk you through how to remove textured ceiling step-by-step. You’ll learn about the tools needed, safety precautions, removal methods, and what to do after the texture is gone. By the end, you’ll have the confidence to tackle this project with clarity and safety in mind.
What Is a Textured Ceiling?
Before diving into how to remove textured ceiling, it’s important to understand what you’re dealing with. Textured ceilings were popular for their ability to hide flaws and absorb sound. The texture could be applied in various ways:
-
Popcorn (Acoustic) Ceiling: Sprayed-on, often with a bumpy, lumpy appearance.
-
Knockdown Texture: Applied with joint compound and then ‘knocked down’ for a mottled look.
-
Swirl or Stomp Patterns: Created manually using brushes or rollers.
Each type has different removal considerations, especially depending on the material and age.
Step-by-Step Guide on How to Remove Textured Ceiling
Step 1: Test for Asbestos
If your ceiling was installed before 1985, there’s a possibility it contains asbestos — a hazardous material. Never attempt to remove the ceiling without first testing for asbestos.
How to test:
-
Purchase an asbestos test kit or hire a certified inspector.
-
Carefully collect a small sample wearing gloves and a mask.
-
Send it to a certified lab for analysis.
If asbestos is present:
Do not attempt removal yourself. Contact an abatement professional to handle the process safely and legally.
Step 2: Gather the Necessary Tools and Materials
For homes that are asbestos-free, you can proceed with gathering tools. Here’s what you’ll need:
-
Safety goggles and dust mask/respirator
-
Plastic sheeting or drop cloths
-
Painter’s tape
-
Spray bottle or garden sprayer (filled with water)
-
6–12 inch drywall taping knife or ceiling scraper
-
Ladder or scaffolding
-
Joint compound (for repair work)
-
Sandpaper or sanding pole
-
Primer and paint (for finishing)
Step 3: Prep the Room
Removing a textured ceiling is messy. Prepare your workspace thoroughly:
-
Remove all furniture or cover it with plastic sheets.
-
Tape plastic sheets to the walls and floor to catch falling debris.
-
Turn off the electricity and remove light fixtures or cover them securely.
-
Open windows for ventilation.
Step 4: Wet the Ceiling
Dry scraping is possible but wetting the ceiling is safer and reduces dust. Use a spray bottle or garden sprayer to mist a small section of the ceiling (about 4×4 feet at a time). Let the water soak in for 15–20 minutes before scraping.
Do not soak the drywall too much, as it can damage the underlying material.
Step 5: Scrape the Texture Off
Once the section is wet, use your scraping tool to remove the texture:
-
Hold the scraper at a 30-degree angle.
-
Use smooth, even strokes.
-
Work in small sections.
Pro Tip: Use a ceiling texture scraper with a bag attachment to minimize mess. Always be cautious around ceiling joints and corners.
Step 6: Repair and Smooth the Surface
After scraping, you’ll likely find dings, dents, and seams that need attention.
-
Apply joint compound to damaged areas and seams.
-
Allow it to dry completely (usually 24 hours).
-
Sand the surface smooth using fine-grit sandpaper or a sanding pole.
-
Wipe down the ceiling to remove dust.
Step 7: Prime and Paint
Once your ceiling is smooth, it’s ready to be finished:
-
Apply a stain-blocking primer to seal the surface.
-
Finish with two coats of ceiling paint (flat or matte finishes work best for ceilings).
-
Consider using a roller with an extension pole for efficiency.
Alternative Methods: Skim Coating or Covering
If scraping isn’t ideal — for example, if the ceiling is painted or extremely difficult to remove — consider alternatives:
1. Skim Coating
Apply a thin layer of joint compound over the texture and sand it smooth after it dries. This is often less messy than scraping and works well for tougher textures.
2. Ceiling Paneling or Drywall
Install new drywall or decorative ceiling tiles over the textured ceiling. This is faster but reduces ceiling height slightly.
Safety Tips for Removing Textured Ceilings
-
Always wear protective gear: mask, goggles, gloves.
-
Don’t rush — wet areas thoroughly before scraping.
-
Keep the workspace ventilated to avoid inhaling dust or moisture vapors.
-
Dispose of debris responsibly, especially if working with older materials.
Pros and Cons of Removing Textured Ceilings
Pros:
-
Enhances home value and modernizes appearance
-
Allows for smoother paint or design finishes
-
May reveal and allow repair of hidden ceiling issues
Cons:
-
Time-consuming and labor-intensive
-
Messy and requires significant preparation
-
Potential health risks if not done properly

Frequently Asked Questions (FAQs)
How can I tell if my ceiling texture contains asbestos?
Ceilings installed before the mid-1980s may contain asbestos. The only way to confirm is to use a lab test kit or hire an asbestos professional. Never assume it’s safe without testing.
Is it safe to remove a textured ceiling myself?
Yes, if the ceiling has tested negative for asbestos. With the right tools and precautions, DIY removal is safe. If asbestos is detected, hire a certified abatement team.
Can I remove a painted textured ceiling?
Yes, but it’s more difficult. The paint seals the texture, making it harder for water to penetrate. You’ll need to score the surface before spraying water or consider skim coating instead.
How long does it take to remove textured ceiling?
On average, expect 6–10 hours per standard-sized room (10×10 to 12×12), including prep and cleanup. This can vary depending on the ceiling’s condition and your experience.
What should I do if the ceiling under the texture is damaged?
Use joint compound to patch holes, seams, or gouges. Sand and smooth it out before priming and painting. In severe cases, replacing drywall panels may be necessary.
Is skim coating better than scraping?
Skim coating is ideal for ceilings that are painted or difficult to scrape. It creates a smooth finish without removing the existing texture. It’s less messy but may take more time and skill.
How much does professional ceiling texture removal cost?
Hiring a pro can cost $1 to $3 per square foot, depending on factors like asbestos, ceiling height, and texture type. DIY can save significantly but requires time and labor.
Conclusion
Removing a textured ceiling is a home improvement project that demands effort but offers rewarding results. Whether you’re planning to modernize your living space, improve lighting aesthetics, or increase home resale value, knowing how to remove textured ceiling properly is key.
From asbestos testing to scraping, repairing, and refinishing, each step plays a critical role in the final result. If done with care and patience, you’ll transform your ceiling into a smooth, sleek surface that enhances the entire room.
While the process can be messy and labor-intensive, the cost savings and satisfaction of DIY — or the polished finish of hiring professionals — are often worth the effort. Make sure you prioritize safety, use the correct tools, and follow proper steps to achieve a professional-looking ceiling free from outdated textures.